Database Access via phpMyAdmin
Through the phpMyAdmin tool, you can easily access your Foodsoft instance's database in the browser and read/modify data.
This is the only way to activate some hidden features for which there is no menu in the Foodsoft user interface yet. In other cases, it can simply be much more practical than manually editing a series of data through the Foodsoft user interface or looking them up.
For many purposes, you don't need any special SQL knowledge.
However, be extremely careful, as you can destroy your Foodsoft instance or break a lot with this tool! Therefore, be cautious when using phpMyAdmin.
You must first request access to your Foodsoft database from the host of your Foodsoft instance (e.g., IG FoodCoops in Austria). Then you can open phpMyAdmin in the browser (the address varies depending on the installation).
Introduction to phpMyAdmin
Navigation
In the left sidebar, you can see which Foodsoft instances you have access rights to.

For each Foodsoft instance, a series of tables are stored:
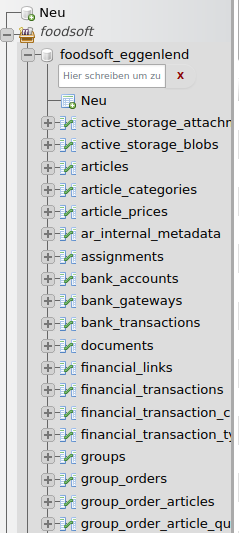
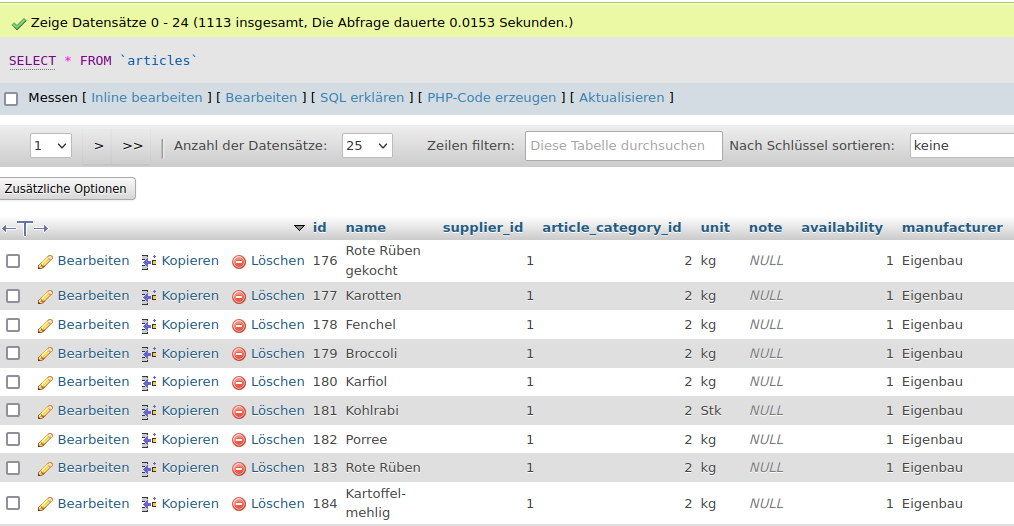
In each table, a series of records are stored, for example, all articles from all suppliers.
Editing Records
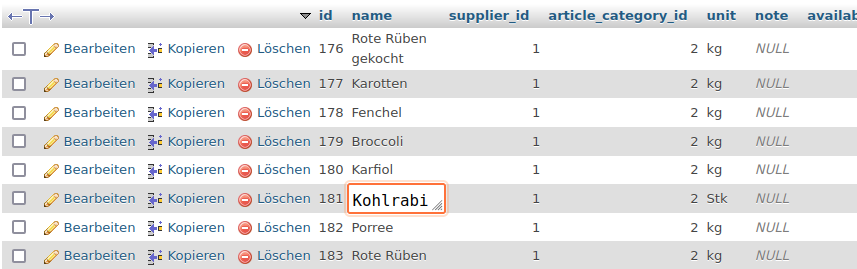
To edit a value in a record, simply double-click on the value:
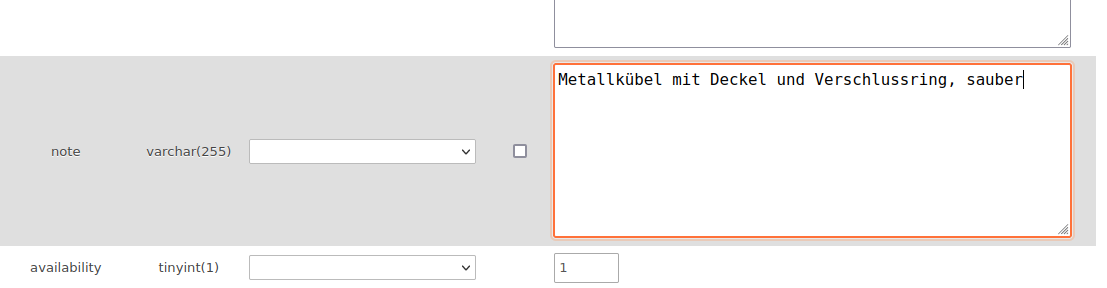
For multi-line values, however, it can be cumbersome to edit them "inline". For this, click on "Edit" on the left. In the following menu, the values can be edited in a larger field.
Then you must save the changes to the record by clicking OK at the bottom:

Or you can simply click Back in the browser or click on Display in the top bar to cancel the editing.
Do not change the
idof a record, as other records refer to it via this ID, and two records in a table cannot have the sameid.
Additional Functions
With the appropriate knowledge, SQL commands and many functions can also be applied. However, you don't need these for the following instructions.
Custom Fields
With this feature, you can create additional fields for
- Users
- Order groups
- Workgroups
- Suppliers (saving doesn't work)
- Invoices
that can then be filled with data through the user interface.
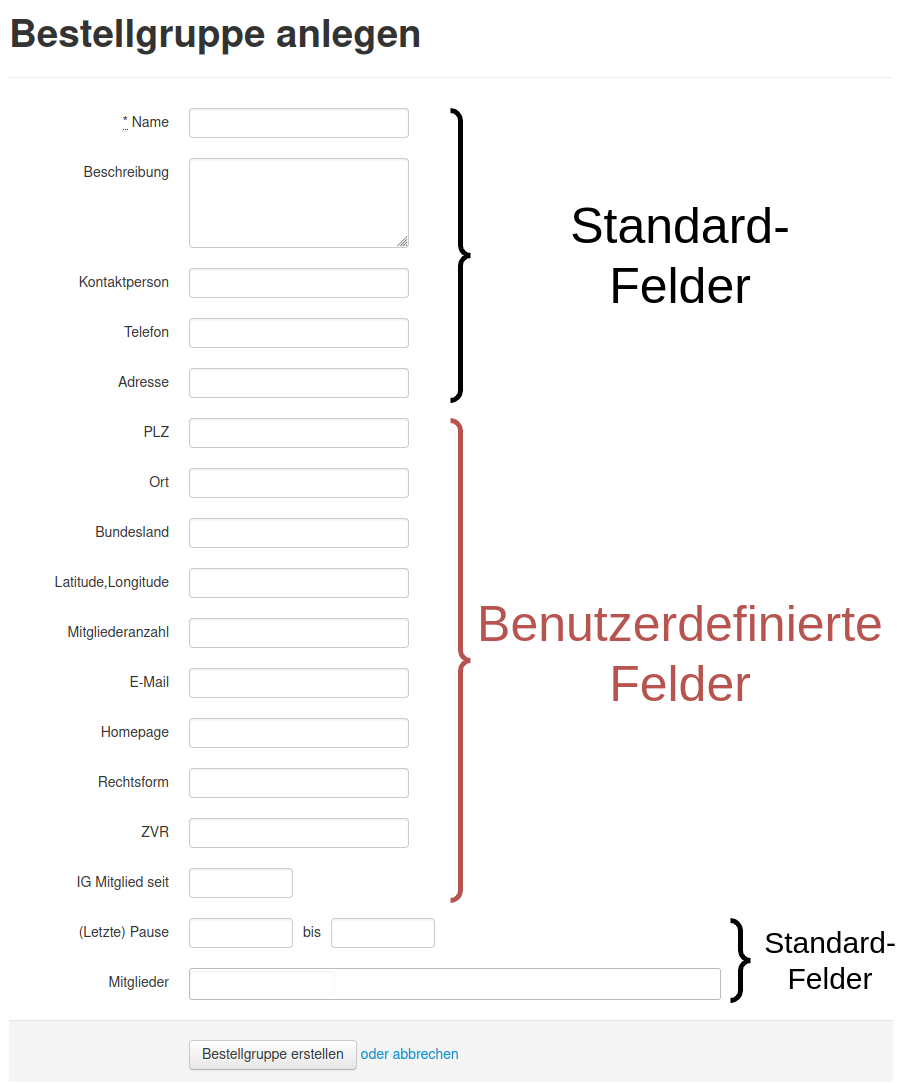
Custom fields are not listed in the display menus, but only in the edit or create menus.
Custom fields are displayed together with the standard fields:
Custom fields for suppliers are displayed but inputs are not saved: Issue 952
Configuring Fields
Opening the Settings Table
The configuration of custom fields is stored in a single record in the settings table.

Finding the Record for Custom Fields
Set the number of records to maximum and enter .custom in "Filter rows", then a record with var = foodcoop.<name>.custom_fields should appear. If nothing appears, try browsing to page 2, 3... until it appears. If it doesn't exist, you must create a new record.

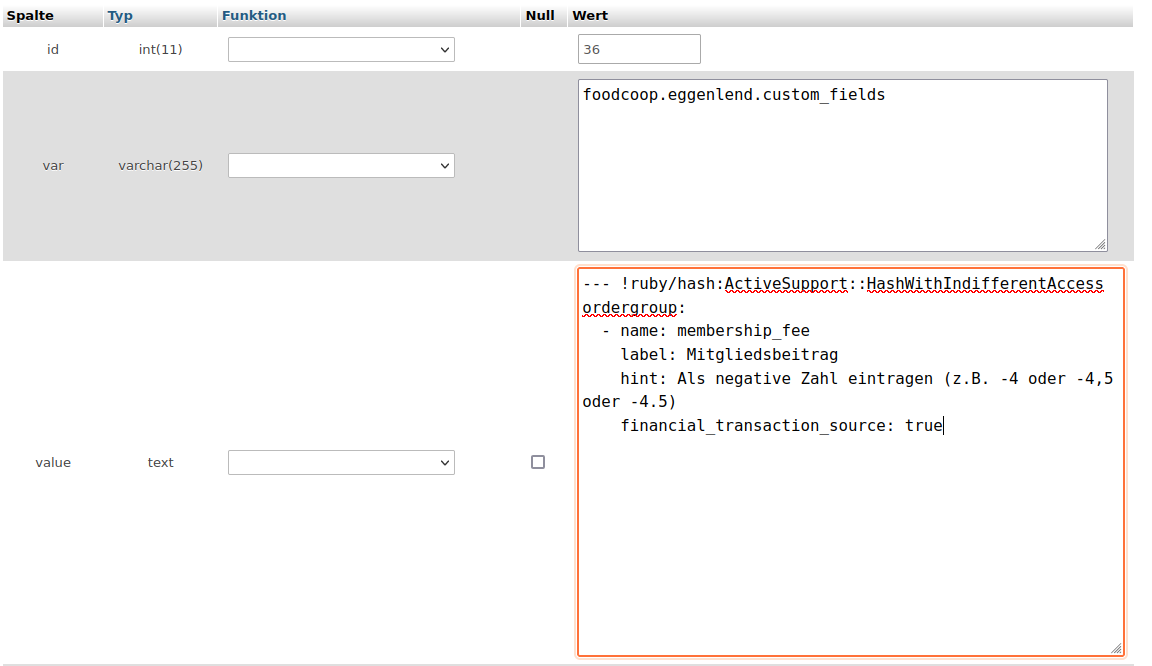
Editing
Click on Edit and change the value under Value. Example:
Syntax
Fields for Different Objects
This way, any number of fields can be configured for users, order groups, workgroups, suppliers, and invoices respectively.
--- !ruby/hash:ActiveSupport::HashWithIndifferentAccess
user:
  - name: user_field
    label: User Field
ordergroup:
  - name: ordergroup_field
    label: Order Group Field
workgroup:
  - name: workgroup_field
    label: Workgroup Field
supplier:
  - name: supplier_field
    label: Supplier Field
invoice:
  - name: invoice_field
    label: Invoice Field
Additional Options
There are other helpful options for fields:
--- !ruby/hash:ActiveSupport::HashWithIndifferentAccess
user:
  - name: test_field
    label: Test Field
    hint: A hint that is displayed below the input field.
    placeholder: 'Hint within the input field'
  - name: text_field
    label: Text Field
    as: text
  - name: password_field
    label: Password Field
    as: password
  - name: float_number_field
    label: Float Number
    as: float
  - name: date_field
    label: Date Field
    as: date
    html5: true
This looks like this:
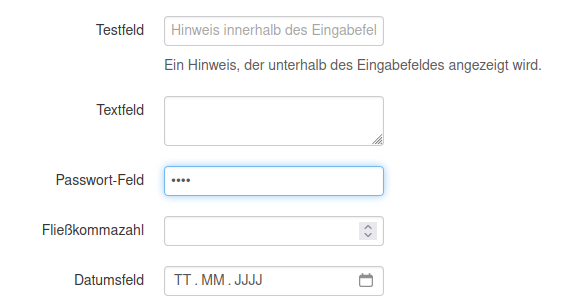
A list of possible options can be found here, but not all these data types work without further configuration (e.g., inputs are not saved). The data types listed above have been successfully tested.
Application to Account Transactions (e.g., for Membership Fee)
--- !ruby/hash:ActiveSupport::HashWithIndifferentAccess
ordergroup:
  - name: membership_fee
    label: Membership Fee
    hint: Enter as negative number (e.g., -4 or -4.5 or -4.5)
    financial_transaction_source: true
The last line causes the following button to appear in the menu Enter New Transfers:
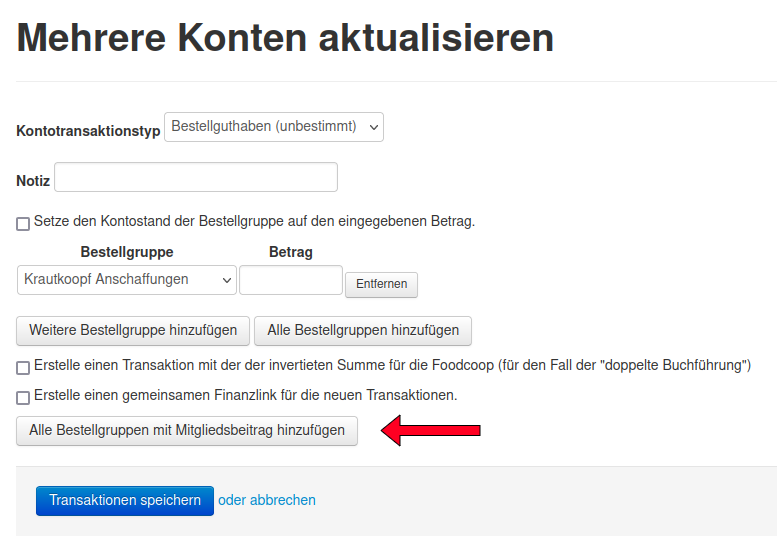
This adds the order groups and inserts the value stored as membership fee directly as the amount.
Since a positive amount is credited to the order group, it is necessary to fill the field with a negative number to collect membership fees. Since this is counterintuitive, it is advisable to point this out with a hint.
The membership fee can thus be set individually per order group - e.g., depending on how many people an order group consists of or what income conditions prevail.
Multiple custom fields can also be defined as financial_transaction_source, then multiple such buttons ("Add all order groups with...") appear next to each other.
The recommended procedure for managing membership fees through Foodsoft is therefore:
- Configure membership fee field
- Consider the amount or calculation basis for the membership fee and what period it refers to
- Enter the respective membership fee for order groups (Note: this can only be done through administration, so it cannot be done by all order groups themselves)
- Set up account transaction class & type for membership fee (can also be done beforehand)
- Order groups load their membership fee (like credit), so they can pay in advance as desired or only for the next collection
- A member collects the membership fee e.g., every month/quarter - it can happen that order groups go into the red with their "membership fee credit" and need to be reminded to pay it back.
Examples of Database Operations
Finding Invoices Without Attachments
For food coops with digital bookkeeping (i.e., all invoices are stored digitally via Foodsoft), a way was sought to find out which invoices have no attachment, e.g., because it was forgotten to upload when creating. In Foodsoft, you would have to click on each invoice individually, as the invoice list does not show whether an attachment exists.
With database access (phpMyAdmin), this can be determined via SQL query.
Select your Foodsoft from the database list and then click on the SQL tab: 
Copy the following SQL query and paste it:
SELECT i.id, i.number, i.date, i.paid_on, i.amount
FROM   `invoices` i LEFT OUTER JOIN `active_storage_attachments` a ON i.id = a.record_id
WHERE  a.record_id IS NULL
ORDER  BY i.id DESC;
To save the query in phpMyAdmin, give it a name: 
Click the OK button to execute the query.
Then the invoices without attachments are listed (most recently created first).
To find an invoice in Foodsoft, call up any invoice there and replace the number after the last / with the corresponding id, e.g.: .../your-foodcoop/finance/invoices/123
Disabling Financial Links of Transactions and Invoices
Every Foodsoft transaction should ideally be linked to another transaction, e.g., a credit top-up with the bank transaction or a credit deduction for an order with a foodcoop booking. If this wasn't done from the beginning, there are many transactions that are not linked. In selection lists when creating a financial link, all those that have nothing assigned are displayed, and that's often very, very many. So that the old ones are no longer displayed, the financial link ID of older transactions can be set from NULL to -1:
UPDATE `financial_transactions`
SET `financial_link_id`=-1
WHERE `financial_link_id` IS NULL
AND `note` LIKE 'Order:%';
This sets the financial link IDs to -1 for all order settlements that are not yet linked - in earlier Foodsoft versions, the settlement transactions were not yet linked via a financial link.
UPDATE `invoices`
SET `financial_link_id`=-1
WHERE `financial_link_id` IS NULL
AND `id`<= 1782;
This sets the financial link ID to -1 for all invoices without financial link with ID <= 1782. These invoices then no longer appear when adding an invoice to a financial link.
Removing Unused Stock Articles
"Delete" all stock articles where stock is 0:
UPDATE `articles`
SET `deleted_at` = '2025-08-12 11:00:00'
WHERE type="StockArticle"
AND quantity=0
AND deleted_at IS NULL;
The articles are not deleted, only a date is entered in the deleted_at field, which makes the articles no longer appear in Foodsoft. If NULL is entered again instead of the date, the article is visible again. When an article is deleted through Foodsoft, the same thing happens and the article is still in the database.
Changing Order Status
Meaning of the state field in the orders table:
open: ordering is possiblefinished: ordering is no longer possible, but the order has not yet been settledreceived: ditto, but order has been receivedclosed: the order has been settled
When the status of an order is changed in the database, the actions that take place in Foodsoft when changing are not performed or reversed, so for example: an order that has already been completed and sent to the supplier contains, after reopening and finishing again, also the orders that were already ordered from the supplier; if the status is set from
opentofinishedin the database, the order is not automatically sent; if an order has already been settled, the corresponding account transactions are not automatically reversed when changing fromclosedtofinished(this must be done manually if desired); if the status of an order is set fromfinishedtoclosedin the database, the corresponding account transactions are not performed - unlike when settling in Foodsoft.
Example: Set status of orders up to ID 999 from finished to settled (without performing corresponding transactions):
UPDATE `orders`
SET state = 'closed'
WHERE id <= 999;
Example: Reset status of orders with specific IDs from settled to finished (without reversing corresponding transactions):
UPDATE `orders`
SET state = 'finished'
WHERE id IN (1775, 1781, 1801, 1811, 1805, 1816, 1821, 1828, 1825, 1832);